Supplies:
1 piece of cardstock 12x12"
approximately 2 pieces of patterned paper 12x12"
glue
adhesive
plastic (for the little "window")
an empty toilet paper roll
A brad, button or similar
First of all you score your CS at 4" on all sides. You will have 9 squares measuring 4x4".

Then you cut as shown in the picture below. You cut from each side. Cut one of the four pieces away, you won't need it. (Marked with a white cross.)

Then you take away one inch from each side on each corner part - my brown stripes mark that. (Save them though, you will need them for the lid.)

It will now look like this.

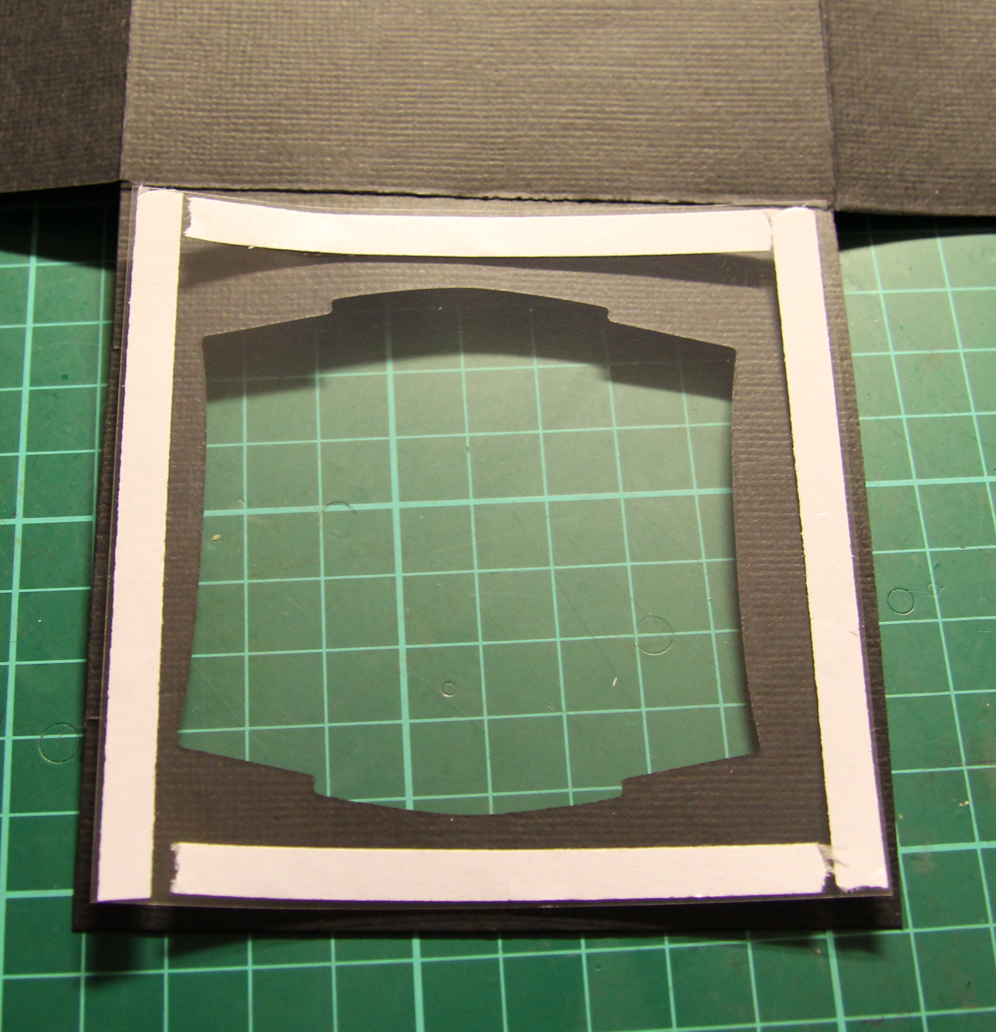
Now it's time to do a hole in the piece that will be the front. (The one without a lip.) I used my cuttlebug and Spellbinders labels two. Cut a piece (approximately 33/4") of patterned paper and run it through your cuttlebug at the same time to make sure it fits. Make sure you have it on the outside of your box.

Put some adhesive om a bit of plastic and tape it down. Attach your piece of patterned paper.
Here you can see the front with the patterned paper.

Put some glue on the lips and cut out some patterned paper to decorate your lips with.

Glue the lips down.

Decorate!

Also decorate the bottom (but I forgot to take a photo...)
Part two will come tomorrow. Then I'll show you one way of doing the lid.
3 kommentarer:
Thanks so much!
Gulle dig som delar med dig, ska absolut prova någon gång:)
Kram
Vilken bra beskrivning du har gjort, ska pröva den framöver. Tack för att du delar med den till oss. Kram kram
Skicka en kommentar